
Welcome to the NPC Builder Plugin for Unity, designed to streamline the integration and interaction of non-playable characters (NPCs) within your Unity projects. This guide will walk you through setting up and using the plugin from start to finish.
Prerequisites #
- Unity 5.3 or higher. (Unity 2020.2 to use example – because, Input System use).
- Basic understanding of Unity and C# scripting.
Installation #
- Download the NPC Builder Plugin package the from Unity Asset Store (currently under publishing process).
- In Unity, go to
Assets -> Import Package -> Custom Packageand select the downloaded file. - Ensure all the files are selected and click ‘Import’.
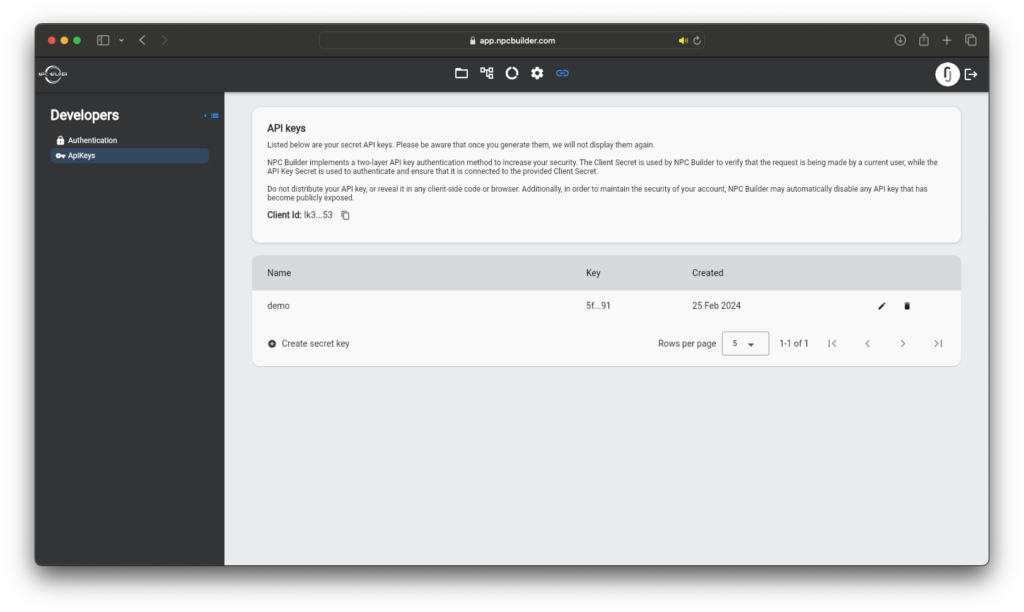
Configuring Credentials #
Before using the plugin, you need to configure your authentication credentials. A config.json file is already provided at the root of the NPC Builder Plugin package within your Unity project’s Assets folder.

Navigate to the config.json file located in the root of the NPC Builder package within your Unity project’s Assets folder.
Open the config.json file and update it with your actual credentials:
{
    "clientId": "YOUR_CLIENT_ID",
    "clientSecret": "YOUR_CLIENT_SECRET",
    "bearerToken": "YOUR_BEARER_TOKEN"
}
Replace YOUR_CLIENT_ID, YOUR_CLIENT_SECRET, and YOUR_BEARER_TOKEN with the actual credentials provided by the NPC Builder platform.
Please note:
- The
clientIdandclientSecretare required for the initial setup and authentication with the NPC Builder API. - The
bearerTokenis an alternative method of authentication. If you have aclientSecret, you may not need to use thebearerToken. However, if you prefer to use a token-based authentication for API calls, you can replace thebearerTokenfield with your actual token. - If both
clientSecretandbearerTokenare provided, the plugin will prioritize the usage of theclientSecretfor authentication. - Ensure that your credentials are kept secure and not exposed in shared or public code repositories.
Using the Plugin #
Attach the NPCBuilderInteractions component to your NPC object in the scene.
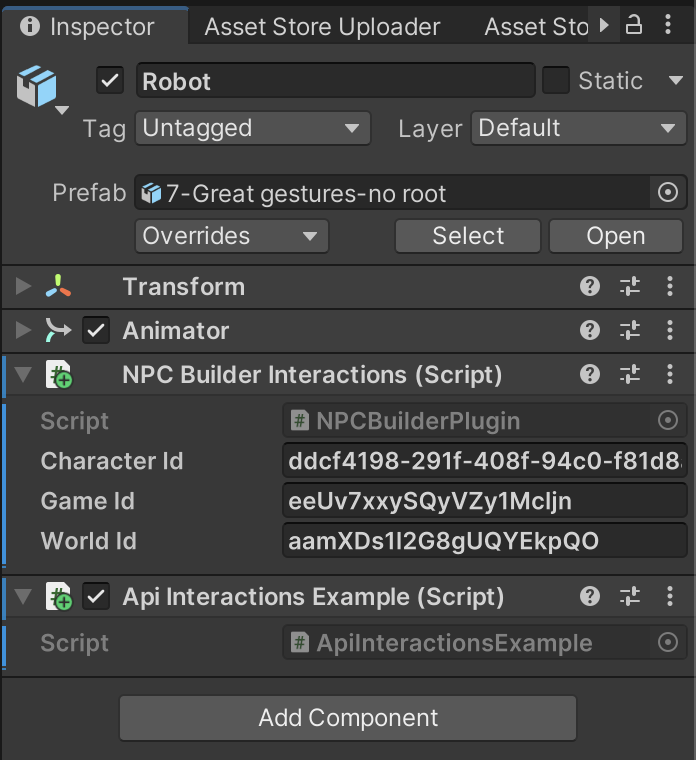
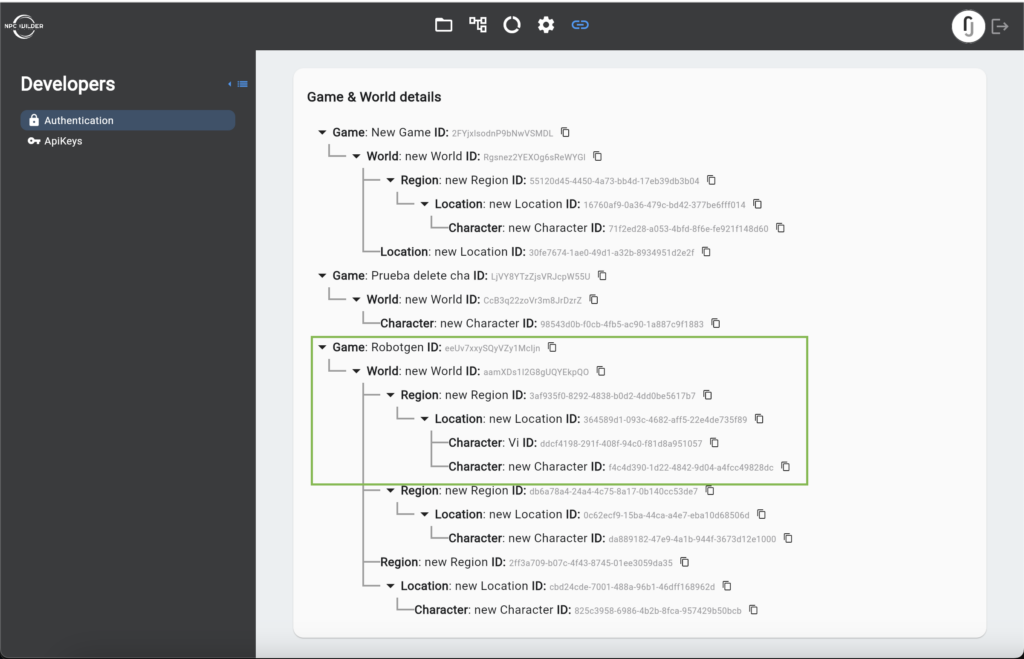
Note: Get the id values from the platform.
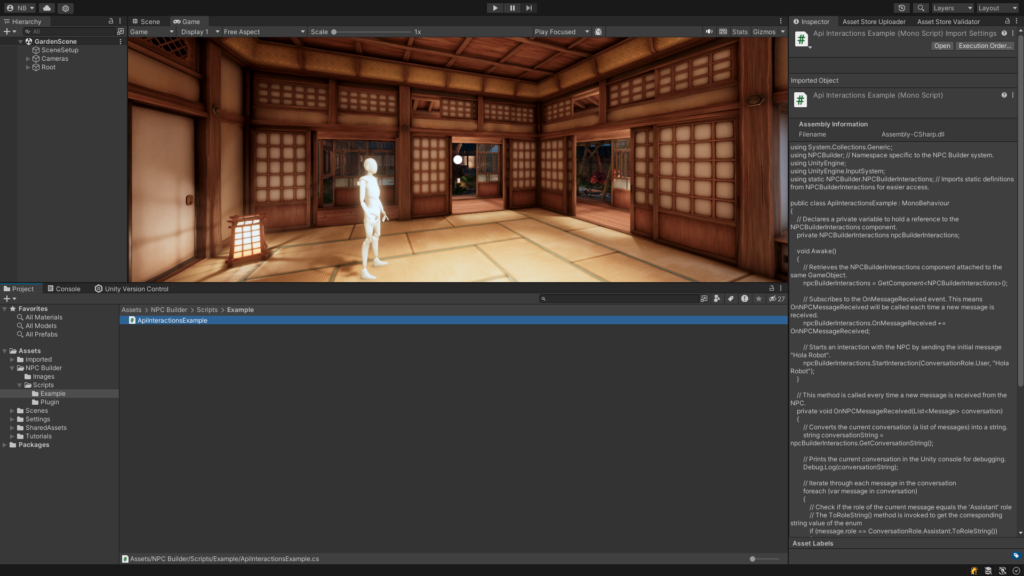
EXAMPLE: Interacting with NPCs #
Use the following example script to initiate interactions with your NPCs:
using System.Collections.Generic;
using NPCBuilder; // Namespace specific to the NPC Builder system.
using UnityEngine;
using UnityEngine.InputSystem;
using static NPCBuilder.NPCBuilderInteractions; // Imports static definitions from NPCBuilderInteractions for easier access.
public class ApiInteractionsExample : MonoBehaviour
{
// Declares a private variable to hold a reference to the NPCBuilderInteractions component.
private NPCBuilderInteractions npcBuilderInteractions;
void Awake()
{
// Retrieves the NPCBuilderInteractions component attached to the same GameObject.
npcBuilderInteractions = GetComponent<NPCBuilderInteractions>();
// Subscribes to the OnMessageReceived event. This means OnNPCMessageReceived will be called each time a new message is received.
npcBuilderInteractions.OnMessageReceived += OnNPCMessageReceived;
// Starts an interaction with the NPC by sending the initial message "Hola Robot".
npcBuilderInteractions.StartInteraction(ConversationRole.User, "Hola Robot");
}
// This method is called every time a new message is received from the NPC.
private void OnNPCMessageReceived(List<Message> conversation)
{
// Converts the current conversation (a list of messages) into a string.
string conversationString = npcBuilderInteractions.GetConversationString();
// Prints the current conversation in the Unity console for debugging.
Debug.Log(conversationString);
// Iterate through each message in the conversation
foreach (var message in conversation)
{
// Check if the role of the current message equals the 'Assistant' role
// The ToRoleString() method is invoked to get the corresponding string value of the enum
if (message.role == ConversationRole.Assistant.ToRoleString())
{
// If the message is from the assistant, its content is logged
Debug.Log(" Assistant message: " + message.content);
}
}
}
void Update()
{
// Checks if the s key was pressed.
if (Keyboard.current.vKey.wasPressedThisFrame)
{
// If the 's' key was pressed, initiates a new interaction with the NPCBuilder Api, sending the message".
npcBuilderInteractions.StartInteraction(ConversationRole.User, "Que quieres?");
}
if (Keyboard.current.cKey.wasPressedThisFrame)
{
// Clear the conversation
npcBuilderInteractions.ClearConversation();
}
}
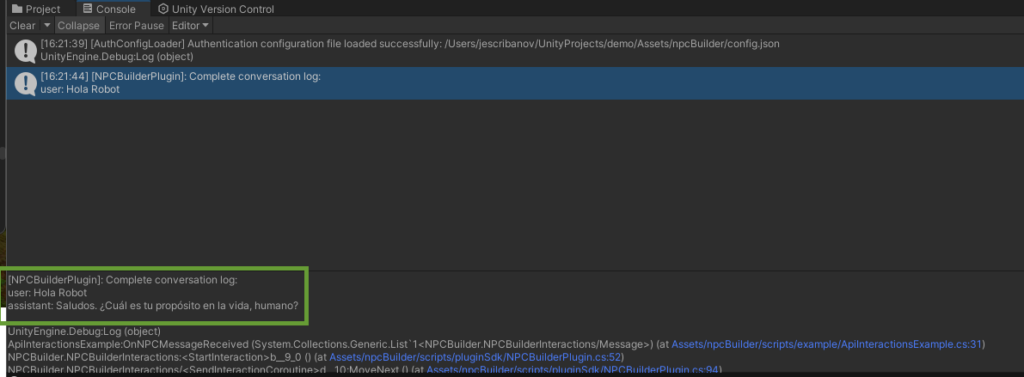
}As we can see in the image below, the conversation returned by the NPC Builder API is displayed.
Events #
Events enable you to trigger NPC behaviors—either as standalone actions or in combination with specific items—based on user interactions or game logic, facilitating dynamic interactions between NPCs and players.
Event Types #
- Action Events: Trigger actions that do not involve an associated item (e.g., an NPC following the player).
- Item Events: Include an associated item, such as providing a token to the player.
Configuring Events on the Platform #
To add and configure events or items on the platform, we have two options: creating them globally, allowing reuse across different characters, or setting them individually in the character’s properties.
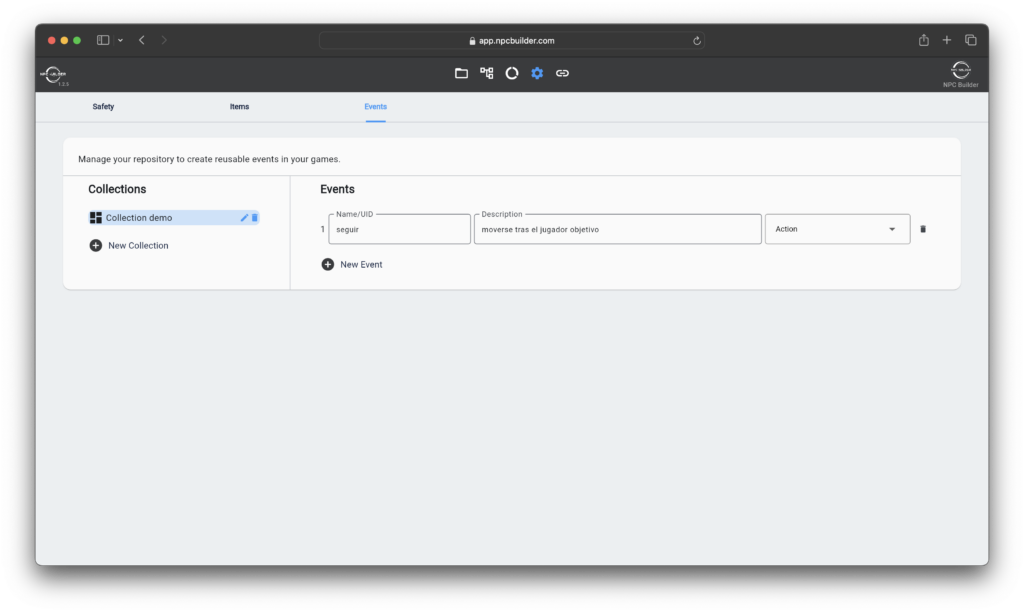
Adding events or items globally #
To add events or items globally, go to Settings and add them to collections.
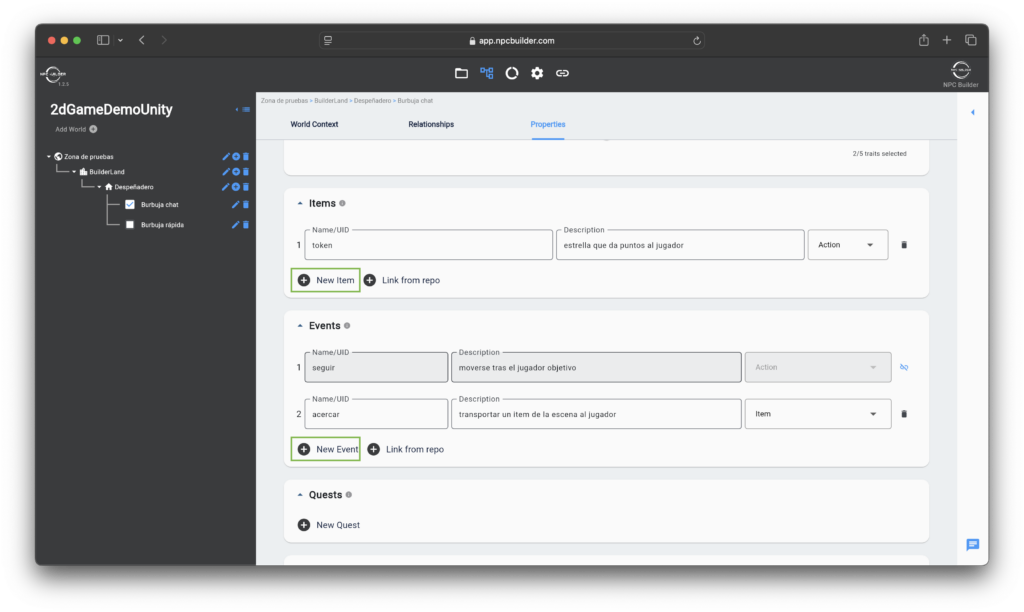
Add events individually #
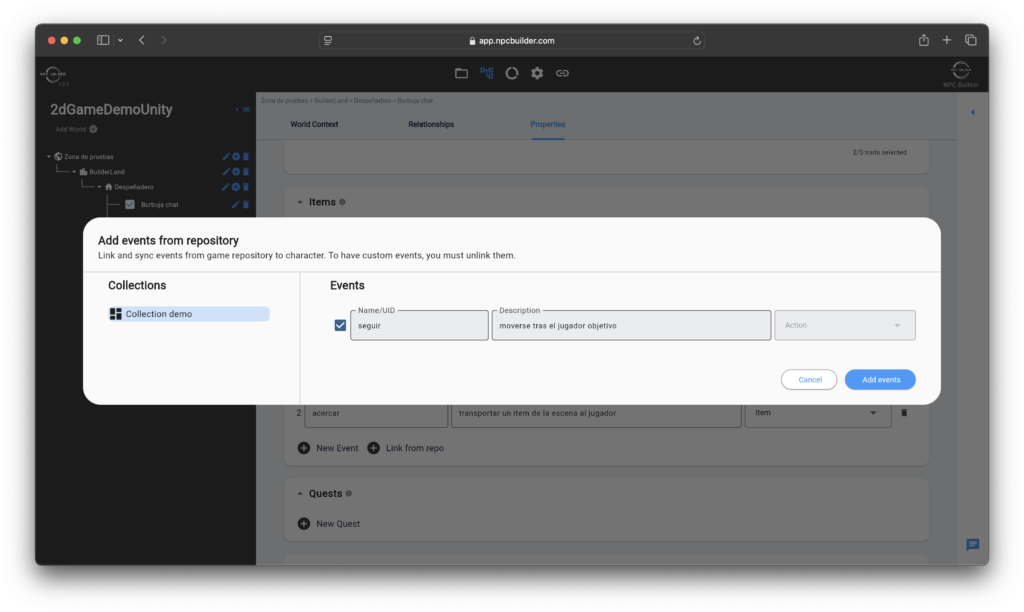
To add events or items individually in the character’s properties, simply click “New Item or New Event”
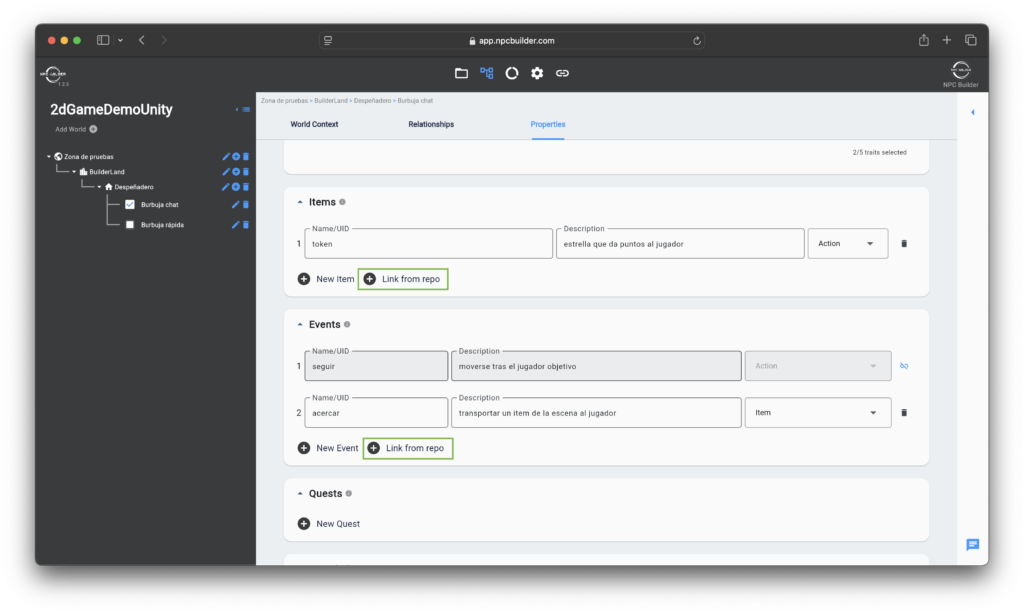
To link globally defined events or items, click “Link from Repo” and add the corresponding item or event.
Definition of Item and Event components #
Event #
Represents an event triggered by an NPC or player, such as picking up a ball.

- Name/UID: Serves as a unique identifier for the event.
- Description: Provides depth for understanding the identification of the event.
- Type:
- Action: Specifies a standalone operation, defined by its name and description.
- Item: Links the action to specific items defined in the properties section.
Item #
Item associated with the event if the event has been specified as an item type.
- Name/UID: Serves as a unique identifier for the item.
- Description: Provides depth for understanding the identification of the item.
- Types:
- Trade: Items intended for trading purposes, such as those involved in purchase or barter events.
- Action: Items that have a specific objective or purpose within the story or gameplay.

Usage and integration in the Inspector #
To integrate user or character events, we only need to specify the event name exactly as it was defined in the task and add items to it if applicable.
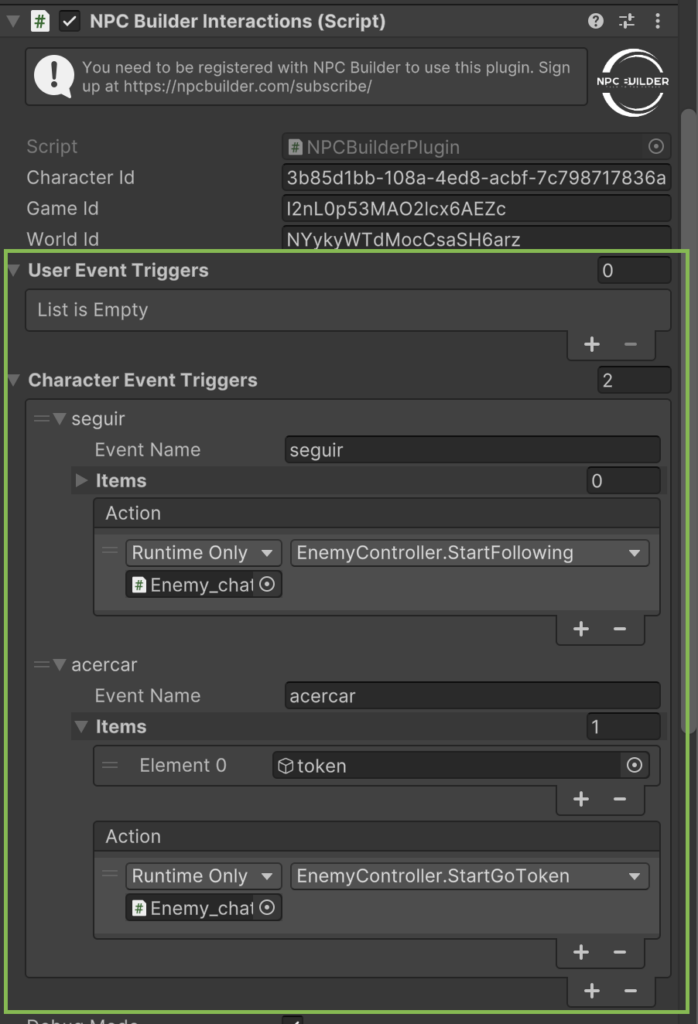
To execute a specific event within a determined function, the function must be linked in the Action field of the Inspector.
If an item applies, a GameObject should be assigned, which will be programmatically retrieved through the event. The item will be dynamically set based on the event using the following code:
nPCBuilderInteractions.getGameObjectAssociatedToEvent += (GameObject gameObject) =>
{
    if (gameObject != null)
    {
        item = gameObject;
    }
};